vizz documentation
A realtime generative visual instrument. This covers building a look, playing a set, and wiring it into a rig — from first launch to a projector at a venue.
Install and first launch
macOS — download from
the latest release
and drag vizz.app to Applications, or run:
curl -fsSL https://raw.githubusercontent.com/legofsalmon/vizz/main/scripts/install.sh | bashReleases are signed with a Developer ID and notarized, so they open with a normal double-click. Syphon is embedded — there is nothing else to install.
Windows and Linux build from source and are tested in CI, but have no installer yet. You will need a Rust toolchain:
git clone https://github.com/legofsalmon/vizz
cd vizz
cargo run --release
What happens on first launch. A window opens sized to
your display — 1440×900 on most laptops — already playing the look
called Tunnel, with the control panel on the left and a card along the bottom
naming the keys: the number keys fire the built-in looks, Space flashes,
P is the screen you play from. A twenty-song demo set is installed on
that screen; right-click the + beside its deck chips to remove
it. OSC is listening on UDP 7000 and — on macOS — a Syphon source named
vizz is already published, so Resolume or VDMX can see the output
before you have touched anything.
The three screens
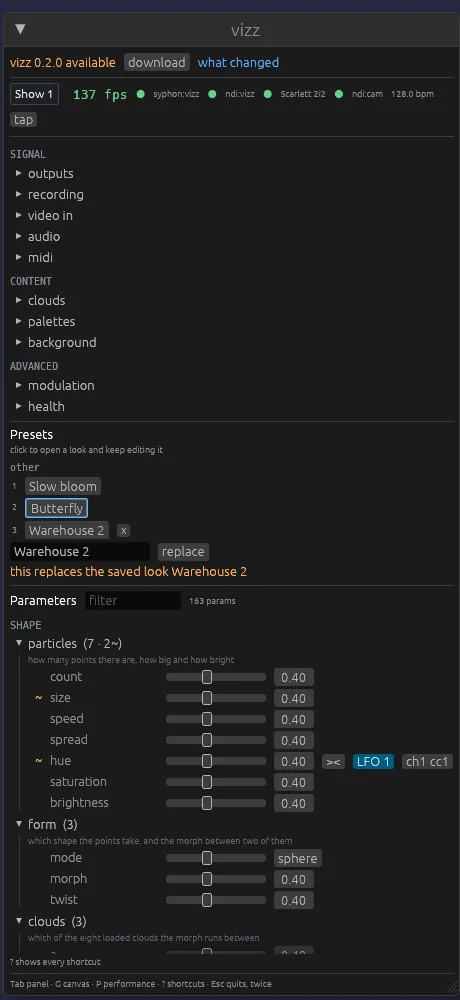
vizz has one window and three overlays on it. The visuals keep running underneath all of them.
| Screen | Key | What it is for |
|---|---|---|
| Control panel | Tab | Every parameter, grouped. Where you build a look. Open on first launch. |
| Performance | P | Big faders, scene pads, punch buttons. Where you play. Nothing here can destroy work. |
| Modulation canvas | G | A node graph: what moves what. Editing, not performing. |
Press ? at any time for the shortcut list on screen.
Shows
The name at the start of the panel, and at the start of the performance
strip, is the show you have open. Click it for the list of
shows on this machine, and for new show…,
save as…, rename… and delete.
A show is everything you built for one band or one night: both grids, the pages of pads, your looks, your patches, your fader layout and your slider ranges. Switching shows swaps all of it at once.
A show carries its own preset library, which is what makes one a
complete thing you can copy to another machine and have work — a pad names a
look, so the pool it names travels with it. So new show… starts
with an empty library: the built-in looks are always there,
save as… is how you carry your own looks into a new show, and
the built-in set is one right-click away on the + beside the deck
chips.
What does not travel is the rig. Your output size, audio device and controller map stay where they are, because they describe the machine in front of you rather than the set you are playing — plug into a different rig and your show is unchanged; open a different show and your rig is unchanged.
There is no save button. Everything above is written the
moment it changes, so save as… means copy this show and
carry on in the copy rather than "write it down before you lose it".
Nothing is ever lost for not having pressed anything.
A name already taken counts up rather than overwriting: type
Warehouse twice and the second one is Warehouse 2.
The last show cannot be deleted — there would be nowhere for the next pad to
live.
Build your first look
The fastest route in is to start from something that already looks like something, then pull it apart.
- Click a preset. In the panel's Presets list, click Butterfly (the Lorenz attractor) or Tunnel (feedback, the high-energy one). The look glides in over a few hundred milliseconds rather than cutting.
- Open a parameter group. The list below is grouped by
address —
particles,shape,fx,color,camera. Each header shows how many controls it holds. - Move something obvious.
/fx/trailis the one that turns a particle field into VJ material: it is how much of the last frame survives into this one. Take it to 0.9 and add/fx/zoomfor a tunnel. - Find a control by name. Press / and type. The groups flatten while you filter, because once you have typed a name you already know what you want.
- Keep it. Type a name in the box under the preset list and press Enter. Your presets live beside the built-ins and can be recalled by number, MIDI or OSC.
Sliders that will not stay put. A parameter with a
~ beside it is being modulated — the value is still yours, and
modulation rides on top as an offset. Hover the mark to see the current
offset. The >< button narrows a slider's working range so a
fader can sweep the part you care about.
Presets
A preset is where every knob is sitting. It is not the modulation graph — that is a patch, stored separately, so recalling a look never rewires your LFOs.
Six ship with the app and cannot be overwritten: Slow bloom (a neutral opener), Butterfly, Tunnel, Stage (cloud inside the room, forced perspective), Confetti and Ribbon. Your own go beside them.
- Recall — click it in the panel, press 1–9
or 0 for slots 1–10, send
/preset/recall, or learn a MIDI button to it. All four are the same path. - Recall does not snap. Values arrive as targets and the per-parameter smoothing carries them from wherever they are — a glide, not a cut. That is what makes presets usable mid-track.
- Each preset sets only what matters to its look, so recalling one leaves everything else where you left it.
- Two things are never captured.
/master/dimis the panic fader — a preset that restored it could black out the show, or silently undo a blackout somebody reached for./preset/recallis excluded because a preset containing it would fire another preset on load.
Slot 0 means nothing selected and presets start at 1, so a controller resting at zero cannot fire anything on startup. Recall is edge-triggered: it fires when the slot changes, so a button parked on a slot does not re-apply its preset every frame and pin the controls you are trying to adjust.
Pictures and families
On the performance layout every look wears a picture of
itself: the master output as it was when the look was saved, kept
beside the presets in presets/thumbs/*.png. A preset is a list of
numbers under a name somebody typed at 2am, and by the next gig the name is a
guess — the only thing that reliably says what a look is, is the look.
Pictures are taken without being asked for: on save, because what is on screen is the thing being saved; and the first time a look is fired, a second or so after so the morph has finished — which is what gives the built-ins, and everything saved before this existed, a tile worth looking at. A look that has a picture keeps it. update picture on a tile's right-click menu takes a new one from whatever is on the output now. They are a cache: throw the folder away and the app fills it back in as you play.
Looks are also grouped by what they were built on, which each preset records when it is saved. Those sort into five families, each with its own colour on the tile's leading edge and as the heading in front of its group: clouds (a loaded scan, mesh or live stream), shapes (sphere, torus, knot, grid, shell), attractors (Lorenz, Aizawa), demo set (the shipped set's looks) and built in. Anything saved before looks recorded a source lands in unsorted, and the heading is dropped when a library has only one family.
Grouping changes where a look sits on screen and never what fires it: the
slot number stays on every tile, because that is what /preset/recall,
the number keys and every MIDI binding address.
Scenes and transitions
A preset recalled by number is a cut. A scene is the other thing you want during a set: moving from one look to the next over musical time.
Sixteen pads, laid out like a sequencer — four by four in the panel, sixteen across on the performance layout.
- Build a look.
- Click store to arm it, then press a pad. The pad now holds that look.
- Repeat for as many pads as you want to travel between.
- Press pads to move. Set blend to the transition length in seconds and pick a curve — linear, smooth, ease in, ease out, or cut.
The blend is in the data, not in the picture. Crossfading two rendered images of a particle field gives a double image that reads as a mistake. Interpolating the parameters gives one field whose settings are somewhere between the two — still one of everything, and it looks like the material moving rather than like a mixer.
Two things do not interpolate. Switches jump at the half-way
point: /fx/mirror has off, x and quad and nothing sensible
between them. Cloud slots never blend, because half way between
slot 0 and slot 2 is slot 1 — a different cloud entirely, which would flash on
screen part-way through every move.
Firing during a transition re-aims from wherever the blend has reached, so you are never locked out until the last move finishes.
Autopilot walks the filled pads in time with the beat clock,
every /scene/bars bars. It fires on the bar boundary and never on
the frame you switch it on. The performance layout shows it as a wide green
bar naming the pad it is heading for.
Decks and Resolume
Sixteen scenes and sixteen gravity slots is a generous evening if the set is one continuous thing, and nowhere near enough if it is twelve songs that each want their own looks. A deck is a page of both grids together, one per song.
The chips above the pads on the performance layout are the set list.
- Click a chip to turn the page. The pads underneath — scenes and gravity both — become that song's.
- + makes a fresh empty page; right-click a chip and choose duplicate to start the next song from this one, which is usually what you want.
- Right-click for rename… and delete page. The last page cannot be deleted.
A deck holds references, not copies. Looks live in one pool, so the same preset can sit on a pad in every song and refining it once improves all twelve. Deleting a page throws away an arrangement, not an evening's work.
Turning a page changes nothing on screen. Switching decks fires nothing and writes no parameter: whatever is showing stays until you press a pad. Every page turn happens in front of an audience. A blend already running finishes, but stops claiming a pad — after a page turn no pad on screen produced what you are looking at.
/deck/select is an ordinary parameter, so a chip, a controller
button and an OSC message are one gesture. Bindings name the deck
number, exactly as the pads and preset slots do, so sixteen buttons address
sixteen pages. Right-click a chip to learn one. Two buttons do instead of
twenty-four: /deck/next and /deck/prev turn one page
per press and stop at the ends, so a controller with a spare pair of pads leafs
through a set list without a button per song. The ‹ ›
beside the set list are the same two.
Following Resolume's columns
Arena's column launches can drive vizz. In Arena ▸ Preferences ▸
OSC turn on OSC Output and point it at this machine on
vizz's OSC port (7000 unless --osc-port says otherwise), then turn
on resolume beside the deck chips.
Launching Arena column N then fires column N here — the scene pad and the gravity pad of that number, together, which is what a column means in Arena too. Keep the two grids arranged in parallel and one button runs the video and the field.
Off unless you ask for it. The OSC listener binds every interface by default, so following hands anyone on the venue's wifi the scene transport. The switch is remembered between runs.
Each page declares which columns it follows. A deck's origin is the Arena column its column 1 follows, on the chip's right-click menu. With one grid in Arena, leave every page at 1. With one long composition and a song every sixteen columns, set 1, 17, 33 … and each page follows its own stretch; a column outside the live page's stretch does nothing rather than landing on the nearest pad.
Relaunching the column already showing fires it again, unlike pressing the
same pad twice — a relaunch in Arena is a deliberate re-trigger and has to land.
/column/fire is an ordinary address, so anything else that speaks
OSC can play the show by column too.
Arena's deck changes come too.
/composition/decks/N/select picks page N here. A deck is the song
and a column is the section, so with the same messages reaching the lighting rig
one launch moves the video, the lights and the field to the same place.
The built-in set
A machine that has never had a show set up on it opens with one: twenty songs, eight sections each, in the same idiom the app was built alongside — hard-edged flat geometry, black paper, bold limited palettes, layers at close frequencies interfering into moiré.
The pads are the parts of a song, in the order you play them: Intro, Build, Break, Drop, Bridge, Peak, Outro, Blackout — the same eight the lighting rig uses.
Only on a machine with no show on it. No deck file, one page, nothing on it. Anything else and the set stays out of the way. To ask for it later, right-click the + beside the deck chips; it replaces every page, so it asks once.
Each song carries one designed look, and its eight pads are that look read through the shape a song has — a bed, a rise, something stripped back, a hit, a hold, the biggest thing in the song, a return to the bed, and an ember. The Drop pad is the designed look exactly; everything else is measured from it. A quiet song's peak stays under a loud song's, so the set's arc survives into the pads.
Every pad is an ordinary preset, so any of them is one store away from being yours.
Punch FX
The things you do on the drop. All five are momentary — they apply while held and rest at zero — so nothing can leave the output stuck inverted, and no preset or scene can capture one.
| Gesture | Address | What it does |
|---|---|---|
| Flash | /punch/flash | White out. Space is the key. |
| Black | /punch/black | Blackout — kills the colour, keeps the coverage. |
| Invert | /punch/invert | Inverts the finished picture. |
| Freeze | /punch/freeze | Holds the picture. The set keeps moving underneath, so releasing snaps to where the music got to. |
| Strobe | /punch/strobe | Beat-synced. /punch/strobe_div sets beats per cycle. |
On the performance layout they are the PUNCH row: press and hold, or shift-click to latch one on. A learned MIDI note is momentary for free, because the gesture rests at zero — press to fire, release to stop, with no mode to get stuck in.
Gravity
Four wells that pull or push the particles, sitting above whatever shape is
on screen. Positive strength attracts, negative repels; radius sets the reach;
/gravity/amount is the master depth for the whole layer.
Gravity has its own 16-pad grid, with its own store, blend time and curve, so a gravity move can be fired independently of a scene change — the field can lurch without the look changing, or both can move at once on different timings.
Performance faders
The FADERS row is sixteen assignable faders plus the master. Click a fader's caption to assign it to any parameter; click learn beneath it and move a controller to bind MIDI.
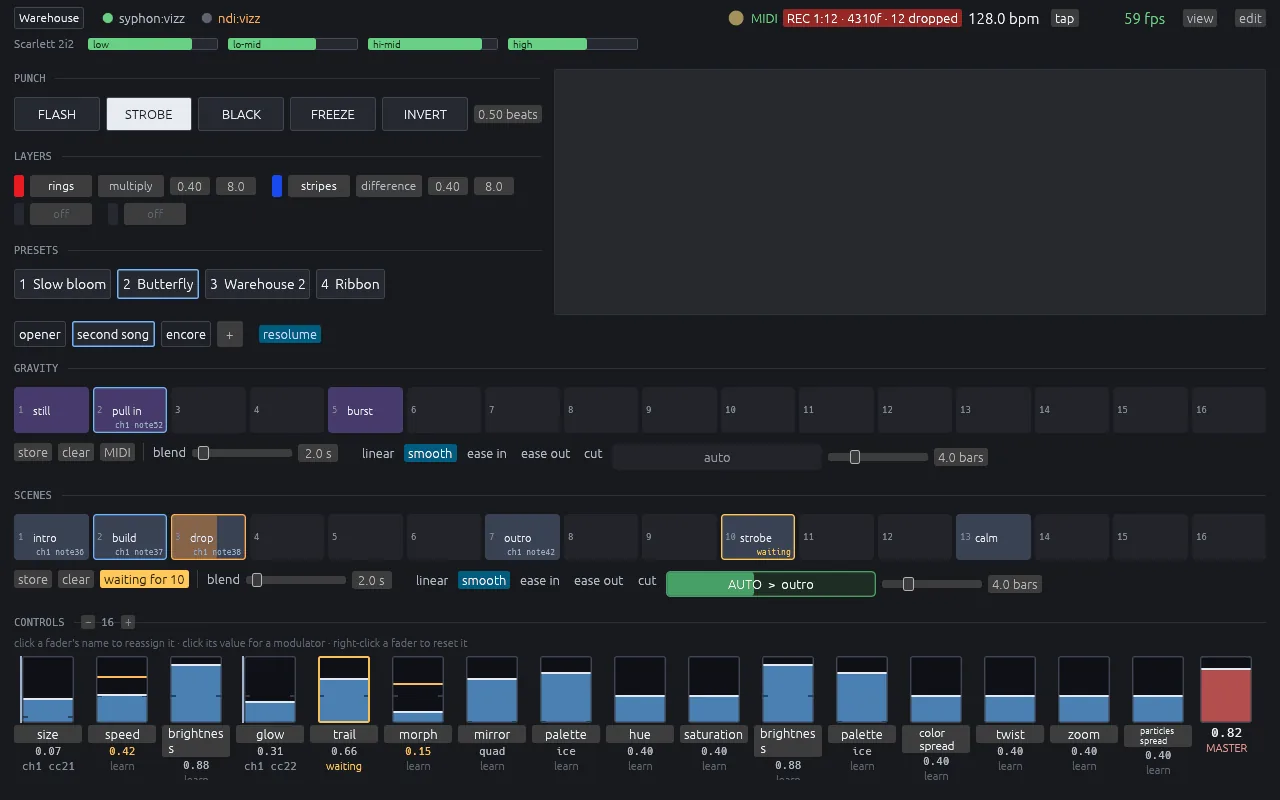
The master is /master/dim, the panic fader. It is
never captured by a preset or a scene, so nothing you fire can undo a blackout
you reached for.
Shapes and geometry
/shape/mode sweeps through eight forms, and fractional values sit
between two of them — it is a sweep, not a switch:
0 sphere · 1 torus · 2 knot · 3 grid · 4 shell · 5 Lorenz · 6 Aizawa · 7 cloud pair · 8 sphere again
The range wraps, so the top morphs the Aizawa attractor back into the sphere.
/shape/morph adds an extra blend into the next form and
/shape/twist shears the whole field. /shape/wind blows
through it — an ABC flow, divergence-free and chaotic, read as a displacement
so it works on a scan as on a sphere — and /shape/wind_rate is how
fast it changes.
Lorenz and Aizawa are real strange attractors, integrated per particle rather than drawn as a static curve — the field genuinely flows along the attractor, which is why they read as motion rather than as a picture of a shape.
Point clouds, words and images
Eight cloud slots: two built-in attractors and six loadable. Files, typed words, images and a live stream all compete for the six.
From a file
Drag a .ply, .xyz, .csv,
.pts, .obj or .stl onto the window, or
start with --cloud scan.ply. PLY reads both ASCII and binary
little-endian, with per-point colour where the file has it. An OBJ or STL mesh
is scattered over by area with sixty-five thousand points, each facing the way
its triangle does, so a model is lit as soon as it lands. A 3D Gaussian
Splatting capture, which is a binary PLY too, keeps its splats for
/particles/splat to draw. A file that will not parse is a warning, never a startup failure.
From a word
Open the panel's clouds section, type into the
type a word field and press Enter. The string is rasterized
with the app's own font into a cloud you can morph against any other slot.
Typed clouds persist as text:WORD and come back after a restart.
From an equation
The clouds section's generate… menu, or --cloud gen:thomas,
fills the next slot from a formula. Seventy-two of them, grouped in the menu by
what they are — and the whole catalogue is a page of its
own, with a picture of each and the paper it comes from:
- flows — twenty-five strange attractors: Thomas, Halvorsen, Dadras, Rössler, four-wing, Chen, Sprott B, Nosé–Hoover, Arneodo, Burke–Shaw, Chua, Hadley, Rucklidge, three-scroll, Rabinovich–Fabrikant, Aizawa, Newton–Leipnik, Sakarya, Rikitake, Shimizu–Morioka, finance, Coullet, Genesio–Tesi, Lorenz-96 and the forced Duffing oscillator. Traced in time order, so the cloud crawls along itself.
- maps — Clifford, de Jong, Hénon, Ikeda and Gumowski–Mira, lifted into depth by delay embedding, and Chirikov's standard map drawn on its torus.
- searched — the two quadratic searches, over maps and over flows.
- surfaces — a Raup seashell, a Gielis supershape, a harmonic-rippled sphere, a real spherical harmonic as an orbital, the Hopf fibration, a Klein bottle, Boy's surface, Dini's twisted pseudosphere, Enneper's minimal surface, and the gyroid with Schwarz' P and D.
- curves — a Lissajous knot, a torus knot, the figure-eight knot, a spirograph and the three-dimensional Hilbert curve.
- fractals — the Sierpinski tetrahedron, Draves' fractal flames, the Buddhabrot, a Kleinian limit set, the Menger sponge, the Mandelbulb, the Mandelbox, a quaternion Julia set, the twisted gasket, Newton's basins, the Markus–Hess Lyapunov fractal, and the Mandelbrot and a Julia set as reliefs.
- grown — four L-system plants, a tree grown by space colonisation and a diffusion-limited aggregate.
- patterns — Chladni sand, a hyperbolic tiling, a Voronoi foam, an icosahedral quasicrystal, and phyllotaxis.
The whole catalogue is on its own page, with a picture of each one, its knobs, and the paper it comes from.
A generated cloud persists as gen:name and is remade on launch.
Some take knobs — the supershape's exponents, a knot's windings, the orbital's
degree and order, the gyroid's wall, the plant's rule, phyllotaxis' angle —
which the menu opens a row for and writes into the spec:
gen:torus-knot?p=2;q=5, gen:orbital?l=5;m=3,
gen:gyroid?kind=diamond;cells=3.
Two are searches. quadratic is Sprott's: random three-dimensional quadratic maps until one is chaotic, judged by a positive Lyapunov exponent. quadratic flow is the same search with an integrator inside it, over vector fields rather than maps, which gives smooth ribbons where the map gives dust. The knob is the seed: roll is an attractor nobody has seen, and the same seed is the same attractor on every machine.
Every named flow is tested for chaos rather than for looks: a test integrates all twenty-three and measures the largest Lyapunov exponent. Two of the shipped ones failed it — Halvorsen and the Hadley circulation were on limit cycles, which fill the same box and look, in any still frame, exactly like attractors — and have been put back on their chaotic constants.
From an image
Drag a .png or .jpg on. Position comes from the pixel
grid, colour from the pixel, and a shallow relief from luminance. Fully
transparent pixels are skipped, so a logo keeps its silhouette instead of
arriving as a rectangle.
From a live stream
vizz --live-cloud tcp://192.168.1.9:9000    # connect to a streaming app
vizz --live-cloud listen://0.0.0.0:9000     # wait for one to connect here
vizz --live-cloud /tmp/live.ply             # re-read a file as it is rewritten
While it is listening, the panel prints the address to send to —
send to 192.168.1.42:9848 — with a button to copy it. Point your
sender at that. It is only shown for a listen:// address: if you
are dialling out to host:port instead, the address that matters is
the other machine's.
From a simulation
vizz --live-cloud sim:fluid       # Stam's stable fluids, driven by the audio
vizz --live-cloud sim:reaction    # Gray–Scott reaction–diffusion
vizz --live-cloud sim:smoke       # the same solver in three dimensions, with heat
vizz --live-cloud sim:liquid      # water, as particles, in a box that tilts
vizz --live-cloud sim:slime       # Physarum: a network from three rules
vizz --live-cloud sim:swarm       # swarmalators: swarming and syncing at once
vizz --live-cloud sim:cloth       # a sheet in the wind
vizz --live-cloud sim:sand        # an Abelian sandpile, toppling
vizz --live-cloud sim:spiral      # Belousov–Zhabotinsky waves
vizz --live-cloud sim:cyclic      # states chasing each other round a ring
vizz --live-cloud sim:tangle      # one long rod, tying itself in knots
vizz --live-cloud sim:crystal     # a snow crystal, grown one cell at a time
vizz --live-cloud sim:vortex      # smoke rings, as the filaments they are made of
vizz --live-cloud sim:polytope    # a tesseract turning through the fourth dimension
vizz --live-cloud sim:growth      # differential growth: a thread buckling into coral
vizz --live-cloud sim:scope       # an oscilloscope in XY mode, left against right
A simulation is a live cloud that needs no sender: it runs on its own thread
at the frame rate and publishes through the stream's path. The panel's
simulate… button beside receive starts one, and the one running
is remembered across launches. fluid is Stam's stable solver for
the Navier–Stokes equations on an endless sheet, with vorticity confinement and
sixty-five thousand tracers as the cloud — the loudness stirs it, the kick
bursts it, the snare spins it, the highs roughen it. reaction is
Gray–Scott reaction–diffusion, one cell per point, where spots grow, split and
heal; the kick plants new ones. flock is Reynolds' boids
drawing streaks — the loudness their pace, the kick a predator, the snare a
scatter. wind is curl noise: tracers in a divergence-free noise
field, a fluid with no solve; the kick is a gust. kuramoto is
Kuramoto's coupled oscillators on a torus — a loud passage locks them into a
ribbon, quiet frees them. life is a three-dimensional cellular
automaton in the Clouds rule, slow masses that keep reshaping; the kick drops a
seed. orbits is five hundred bodies pulling on each other
round a heavy centre, each drawing its last two seconds as an arc — the
loudness is the clock, the kick a shockwave. pendulum hangs
four thousand double pendulums in a sheet from neighbouring angles: it swings
as one surface, creases, then tears. smoke is the fluid
solver in three dimensions with heat, a plume that rises and rolls up.
liquid is four thousand particles of water in a box that
tilts, gravity swinging round once a bar so it pours corner to corner.
slime is Physarum, one agent per point, each leaving a trail and
following the strongest one it can see — a transport network out of three rules
and no plan. swarmalators swarm and synchronise at once, each
depending on the other, and walk between five states as the audio moves two
numbers. cloth is a sheet of sixty-five thousand particles hung
from its top edge in the same wind /shape/wind blows.
sand is the Abelian sandpile — grains dropped and toppled, and a
fractal nobody designed. spirals is the Belousov–Zhabotinsky
reaction, whose rotating fronts annihilate where they meet.
cyclic is Fisch, Gravner and Griffeath's cyclic
automaton: states in a ring, each waiting to be eaten by the next. Noise
clears into debris, the debris organises into droplets, and the droplets are
consumed by spirals that cannot be destroyed, because a spiral's own wave comes
back round to feed it; in three dimensions the waves are scrolls, and only the
crest is drawn. tangle is one long elastic rod loose in a wind,
its length and its curvature both held as constraints, and self-repulsion on a
grid so it cannot pass through itself — which is the difference between a
tangle and a scribble. crystal is Reiter's snowflake on a
hexagonal lattice: cells that are ice or next to it drop out of the diffusion
and take a trickle of vapour instead, and out of that come plates, sectored
plates and stellar dendrites, sorted by vapour as real crystals are sorted by
humidity. vortex is the thin cores smoke rings are made of,
moving each other by Biot–Savart — rings that catch the one in front and thread
through it. polytope is a regular solid of four dimensions (the
5-cell, tesseract, 16-cell, 24-cell, 600-cell or 120-cell, set with
?kind=) turning through the fourth axis, so it turns itself inside
out; its points walk every edge once, so the lines stroke draws the
wireframe. After Coxeter, Regular Polytopes (1948).
growth is differential growth, after Anders Hoff and Andy Lomas:
one closed thread that grows faster than it has room for and buckles into a
coral meander, never crossing itself. scope is an oscilloscope
in XY mode — left channel across, right channel up, the last second trailing
back into the screen — so a tone is a loop and oscilloscope music draws its
pictures; a mono input is drawn against itself a moment earlier.
The automaton's rule is a knob, written survive/born/states. Past
two states a cell that fails to survive counts down instead of dying, and only
the top of the ramp counts as a neighbour — the ash left behind turns a flat
rule into a solid that grows and crusts. It ships in
4-7/6-8/10, Pyroclastic, which boils; 4/4/5 is a
spiking crystal and 9-26/5-7,12-13,15/5 is Amoeba.
13-26/13-14,17-19 is Clouds, which grows lovely masses and then
stops — so it, and any rule that stops, is started again after four dead
generations.
Showing and crossing between them
A cloud you load is shown. Dropping a file, typing a word,
naming one with --cloud, or the first frame of a live stream all
select the new slot as /cloud/a and point
/shape/mode at the cloud. The shape glides there rather than
cutting, so the field turns into the cloud over about a second.
The one case that does not move the shape is the bank coming back at startup: the clouds you loaded in earlier sessions are restored to their slots, but the look you left behind is left alone.
To choose a cloud, click its name in the panel's clouds
section. A slot is an index, and an index is unreadable once anything has been
loaded — “2” says nothing about whether that is the torso scan or the room —
so the names are the control and there is no slider anywhere that says
2.
Crossing from one cloud to another is what a scene change
does. The pair — /cloud/a, /cloud/b and
/cloud/morph — is machinery rather than a control: a transition
pins a to the cloud it is leaving, b to the cloud it
is arriving at, and sweeps the morph across. It used to be three sliders in
the parameter list, which was one control too many and one idea too many; the
pair only ever exists in order to make that crossing, and the app already
knows when a crossing is happening because it is the one running it.
/cloud/b and /cloud/morph are accordingly refused
from OSC, MIDI and modulation — a second hand on those values fights the
transition and lands the blend somewhere other than the scene it was fired at.
/cloud/a stays settable, because it is which cloud this look
shows: captured by every preset and read back by the next transition to
know what it is blending from.
Particles keep their index across the blend, so the same point travels from one cloud to the other rather than the field being re-scattered. A blend between two unrelated clouds passes through a shapeless middle: that is inherent to index-based morphing. Clouds with related structure morph far better than arbitrary pairs.
Clouds are centred and uniformly scaled into the same box the procedural
shapes use, so /particles/spread means one thing everywhere.
Fewer points than the slot holds means each is repeated with a small
deterministic jitter, because a dense clump at the origin is far more
visually wrong than slight duplication.
Live video as a point cloud
vizz --video-source test      # the built-in pattern
vizz --video-source "OBS"     # an NDI source, matched as a substring
vizz --list-ndi               # what is on the network
A video input arrives as a cloud in its own slot. That is
the whole design: /cloud/a selects it, the palette tints it, the
spread scales it, and a scene change crosses it into a scan or an attractor
with nothing else needing to know it is live. The first frame points the shape at it, the
way a dropped file does.
Each particle takes a fixed cell of the picture and stays there, so the
field reads as a cloud of the video rather than noise sampled from
it. Position comes from the cell, colour from the pixel, and depth from
whatever /video/relief names.
| Control | What it does |
|---|---|
/video/depth | How far the relief pushes along z. Signed, because a picture standing proud of the plane and one sunk into it are different looks; 0 is the flat picture, which is a look too. |
/video/relief | What does the pushing: luminance, hue, saturation or chroma. Luminance is the honest default; the colour ones are what a flat, evenly lit source needs. |
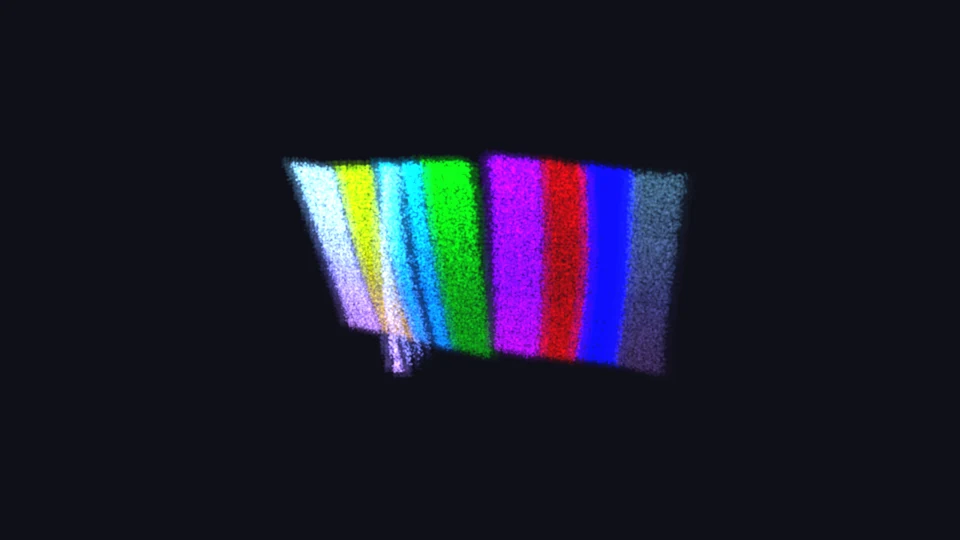
--video-source test is a diagnostic. "Nothing
on screen" has two causes — the feed, or the wiring — and they need telling
apart. The pattern is generated in-process and goes through the identical
path, so a blank output with it running is a fault in vizz, and a blank
output without it is the network or the sender. It moves on purpose: a still
pattern proves a frame arrived once, a moving one proves frames are still
arriving.
Vector layers
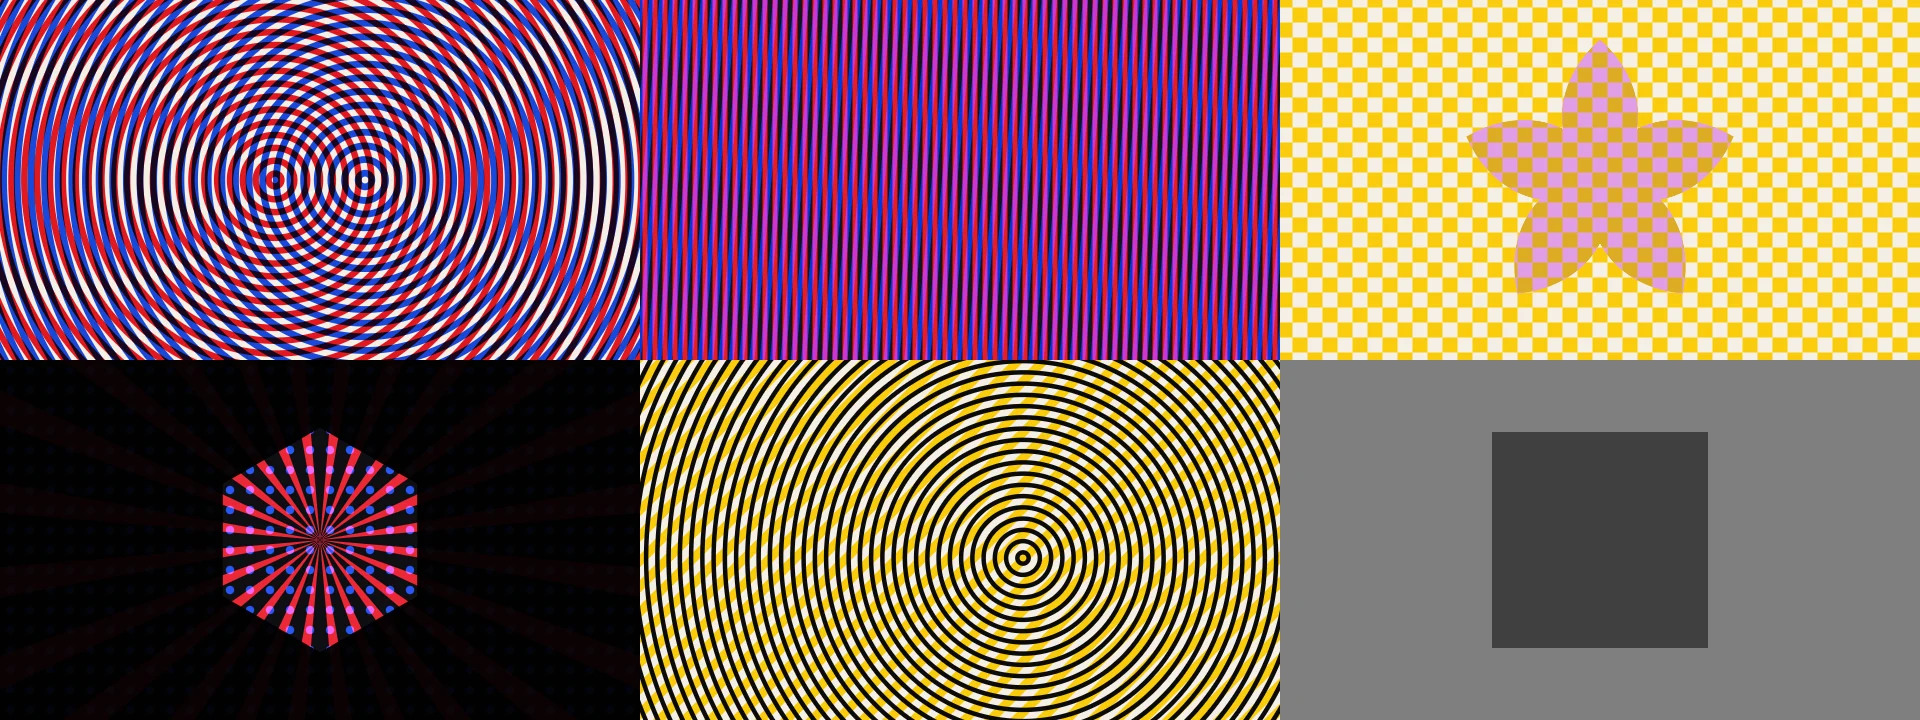
The print side of the app: four layers of hard-edged procedural pattern —
rings, stripes, checker, polygon, star, rays, dots — in flat ink colours from
a shared four-slot palette (/pal/0..3), composited with
multiply/screen/difference-style blends. Two layers at near frequencies
interfere into moiré. Edges are analytically antialiased and stay razor-sharp
at any resolution.
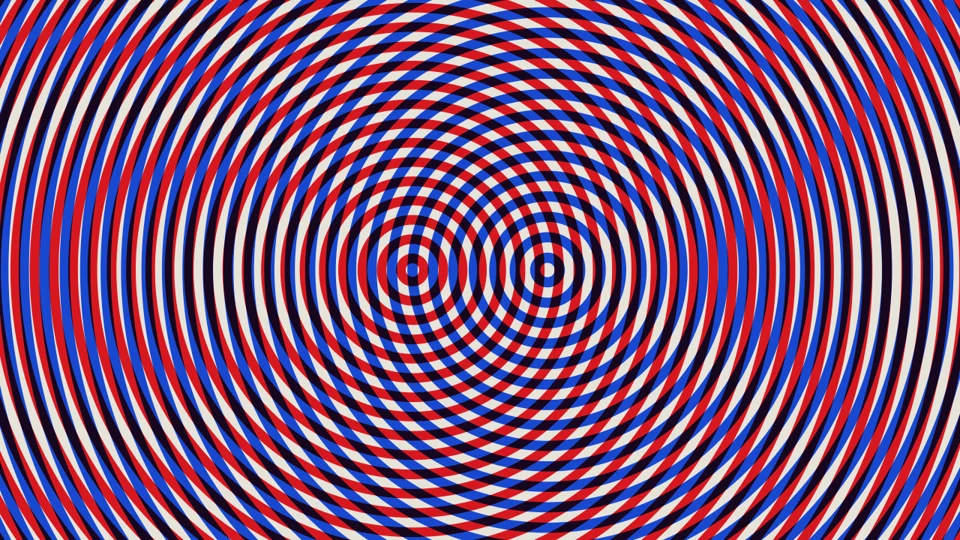
Start from a preset. Three vector looks ship after the six
particle ones — Interference, Poster and Signal.
Recall one and the print look arrives whole; the particle field steps aside
via /particles/count 0, which is part of the look and comes back
with the next particle preset.
The performance layout grows a LAYERS strip when any layer is on — hidden otherwise, like the gravity grid. Per layer: the ink swatch, the generator (click cycles, right-click back — off is on the wheel), the blend mode, and drags for opacity and frequency. Faders remain the way to ride a layer parameter under MIDI.
| Control | What it does |
|---|---|
/vec/place | scene (default): behind the particles, inside the feedback chain — trails, punch and the tone-map apply, layering works. print: after the post chain — exact ink bytes, untouched by feedback, and deliberately out of reach of punch and particles. |
A preset captures its placement. A /vec/place override sent in
the same burst as a recall loses to the preset — send it after the recall
lands.
The "Pulse" patch ships in the modulation canvas's load menu: the kick band gates a snap envelope that blinks layer 2 out on each hit, and a four-beat phasor drifts layer 1's phase. Load it over any vector preset and the layers move with the music.
Camera moves
A camera move is the one gesture you cannot make by hand: orbiting smoothly
for eight bars while also firing pads is two jobs and one pair of hands.
/camera/move picks one of ten canned paths, move_bars
sets how long a cycle takes, and move_size how far it travels.
| Move | What it is for |
|---|---|
| orbit | A full turn per cycle. The one that can run all night. |
| sway | Handheld: a partial turn back and forth, the horizon breathing under it. |
| push | In and back out — the build. |
| pull | Out and back in — the reveal. |
| crane | Rising over the top, looking down by the end. |
| spiral | A helix: turn, rise and close all together. The drop. |
| look around | The camera holds still and its aim sweeps — standing in one place and turning your head. |
| fly through | In through the front, out the back, and round again. |
| walkthrough | Four legs and four corners of a square, at eye level, inside the cloud. Moving through a house. |
| drift | Very slow, never repeating inside a song, always moving. For long ambient sections. |
A move is added to the camera your faders already describe, never written back into it. Switch one off and you are exactly where you were, and a move running is never a reason you cannot still steer. Rate is in bars, so a move locks to the same clock as the sequencer and the LFOs.
/camera/at_x, at_y and at_z aim the
camera at a point in the world — which is what makes a walkthrough possible.
Pan moves the target in the camera's own screen plane, so it keeps the subject
centred by construction: right for framing, and no use for travelling.
Light
Two movable lamps and a directional sun, on top of an ambient level. Everything defaults to off, and off means identical — ambient is 1 and every lamp is 0, which multiplies the picture by exactly one, so no preset you have ever saved looks any different.
Lamps light a volume. Each has a position, a reach, a level and a colour, and falls off smoothly with distance. Walk one through a scan and it reveals the scan. This works on everything — imported clouds, procedural shapes, live video — because it only needs to know where a point is.
The sun lights surfaces. A wall facing the light comes up, a
wall facing away goes down. That needs to know which way each point faces, so it
only does anything on a cloud that has normals — see below.
/light/shape is the dial between the two readings: at 0 a lamp is
pure volumetric falloff, at 1 it respects the surface.
Lamps are white until you colour them. Each has a hue and a tint, because hue on its own has no value that means "no colour" — hue 0 is red, so a lamp described by hue alone would turn your scan red the moment you raised it to see what it did.
/light/torch puts lamp 1 on the camera. It is the partner to a
walkthrough: light arriving from where you are is what makes moving through a
scan read as moving, rather than as the scan fading up.
Haze and light beams
/light/haze fills the space in front of the camera with a lit
haze, like stage haze. The lamps and the sun light it, so a lamp shows as a glow
in the air, and the particles thicken it: /light/smoke turns a cloud
into smoke that is lit on the side facing a lamp and casts a shadow into the
haze behind it. Put a lamp behind a lattice, a tree or an open attractor and its
light comes through the gaps as beams. /light/scatter sets how much
the haze glows when you look towards a lamp through it, against looking from the
side. With no lamps and no sun it is only a faint grey veil: the lights make it.
In the surface mode the haze stops at each surface; in the glowing mode the frame
is taken to lie at the focus distance.
After Wroński's froxel volume (SIGGRAPH 2014) and Hillaire's integration (SIGGRAPH 2015), with single scattering as Max sets it out (IEEE TVCG 1995) and the Henyey-Greenstein phase function (1941).
Normals
A point cloud is points. Whether it also knows which way its surface faces
depends on whoever exported it, and most exports leave the field empty. vizz
reads nx/ny/nz from a PLY when they are
there, and works them out from each point's neighbours when they are not — about
a tenth of a second when a cloud loads. A cloud that genuinely has no surface —
a procedural shape, a video frame — is left alone, and the sun simply does
nothing to it rather than lighting it from a direction nobody measured.
Shading is two-sided: a surface always faces you. Fitting a plane to neighbours cannot tell a normal from its opposite, and picking consistently across a whole cloud still comes out backwards for a scan of a room, where the surfaces you want lit face inwards. There are no shadows here for two-sidedness to contradict, and the alternative is half your scan going black for a reason you cannot diagnose from the front of a stage.
Colour and palettes
/color/palette starts at 0 = plain HSV and
crossfades up through four cosine gradients — warm, ember, ice, neon — with
your own loaded palettes from 5 up. /color/spread is how much of
the gradient the field spans; /color/drive picks what chooses each
particle's colour:
0 index · 1 radius · 2 depth · 3 height
Driving by depth is what makes a cloud read as three-dimensional on a flat screen. Driving by index keeps a scan's own colours coherent.
Your own palettes: drop a palette file on the window and it loads into the next slot and selects itself. Re-dropping an edited file reloads it in place, so you can iterate in a text editor with the app running. Imported cloud colour multiplies the palette rather than replacing it, so the palette still works as a tint and an uncoloured cloud is unaffected.
Effects
The output chain, in order: feedback, mirror, glow, RGB shift, then the finish: the tone shoulder, or the graded finish when /fx/grade is up.
| Control | What it does |
|---|---|
/fx/trail | Feedback — how much of the last frame survives. The single most useful control in the app. Capped below 1.0, because at 1.0 nothing decays and the frame saturates to white within seconds. |
/fx/zoom | Per-frame zoom of the feedback. With trail up, this is a tunnel. |
/fx/spin | Per-frame rotation of the feedback. With zoom, a vortex. |
/fx/mirror | Off, mirror, quad, kaleido. A switch, not a sweep. |
/fx/glow | Bloom lift. |
/fx/shift | Radial RGB split — chromatic aberration. |
/fx/grade | The filmic finish, faded in over the original. Metered exposure that only ever darkens (so a look that clips is pulled back and a fade still reaches black), a mip-chain bloom set by glow, and the AgX curve. The background stays the colour you set. At 0 none of it runs. |
/fx/exposure | Exposure bias for the graded finish, in stops. |
Lines and streaks
/particles/stroke changes what a glowing particle is drawn as,
and /particles/stroke_len how long. At 0, the default, it is a
dot. At 1 it is a line: each particle drawn back along its own path,
so on a flow or a curve thousands of short strokes join up into the path, and
the Lorenz butterfly becomes wire instead of dust. Lines hold still when the
speed is down. On a map, a surface or a fractal the order along the path is
not a shape, so lines read as hatching rather than as the form. At 2 it is a
streak: each particle drawn back through time, fading towards where it
was. That is motion blur, and a streak shortens to a dot when nothing
moves.
A stroke spends four of /particles/count, so turning strokes on
does not change what a frame costs; the same count buys a quarter as many
particles. Each one carries its particle's light spread along it, so a long
stroke is fainter rather than brighter. The surface mode still draws discs.
Plexus
/particles/plexus draws lines between the particles that come
near each other, the network or constellation look, over any cloud and in
either mode. /particles/plexus_reach sets how near is near, in
world units where a cloud spans about two. Up to 2048 particles, spread over
the whole field, are the nodes; each links to its four nearest within reach,
in the colours of its two ends, and a link fades out as its pair drifts apart
so the network knits and frays rather than flickering. The reach is a good
thing to put on an envelope.
Gaussian splats
/particles/splat draws every particle as a soft ellipse of
colour, sorted and blended from the farthest to the nearest, so near ones cover
far ones instead of adding up to light. The value is their opacity. Load a 3D
Gaussian Splatting capture (the .ply that splat trainers and phone
capture apps export) and each splat keeps its own size, turn, opacity and
colour, so the capture looks like the place or person it was made from, and
still turns and morphs with everything else. Any other cloud is drawn as round
splats the size of the particles. A capture's colours are its own; the palette
tints only round splats. A solid, ink or the liquid need the surface mode and
take over from splats.
Solid surfaces
/particles/surface changes what a particle is. At 0, the
default, it is light: sprites add up, nothing hides anything, and a dense core
reads as a bright one. At 1 it is a small opaque disc with a depth, and the
cloud becomes an object. Nearer discs hide farther ones. Lamps light the side
of the form that faces them. The sun casts the cloud's shadow, onto itself and
onto the room. And the room, when it is up, is drawn as dark plaster walls,
floor and ceiling (with its grid still in them) that catch the lamps and the
shadow.
It works on every cloud, normals or not. The lighting reads which way the surface faces from the picture's depth, a few discs across, so a procedural sphere shades as a sphere. Where a scan carries its own normals, those win. In this mode the ambient light is a sky rather than a flat fill: full on surfaces facing up, dimmer on those facing down, so a form still has a top and a bottom with every lamp off. The additive mode is untouched.
Glyphs
In the surface mode, /particles/glyph replaces each disc with a
small solid: a tetrahedron, a cube, an octahedron, a long shard, or a mix of
the four. Each one is turned so its long axis follows the way its particle is
travelling, rolls slowly about it, and is lit by its own faces, so the facets
catch the lamps and the sun. They cast their own shapes into the sun's
shadow. A field of them reads as confetti, scales or debris rather than as a
surface. A glyph draws up to six times the vertices of a disc, so lower
/particles/count with it on a dense cloud.
Fractal solids
In the surface mode, /particles/solid draws a fractal as a lit,
opaque solid where the cloud sits: the Mandelbulb, the Mandelbox, a quaternion
Julia set or the Menger sponge. Each pixel marches a ray in steps the
fractal's distance estimate says are safe until it reaches the surface (Hart's
sphere tracing, 1996), and writes its colour, exact normal and depth into the
same buffers as the cloud, so the two hide each other properly under the same
lamps. /particles/solid_detail is the one knob: the bulb's power,
the box's scale, the turn of the Julia constant, or the sponge's depth. A solid
is a ray march for every pixel it might cover, so it is the heaviest thing in
the surface mode on a large output.
Ink
In the surface mode, /particles/ink draws the lit surface as a
pen drawing. Outlines keeps the colour and inks the silhouettes, folds
and creases. Hatching puts the form on paper and lays its tone down as
up to three layers of crossed lines, and stipple lays it down as dots,
more and larger in the dark. The tone is how much light fell on the surface
against all the light the rig has, so a dark palette is not drawn as a dark
form; with every lamp off, tops are paper and undersides are dark. The marks are
fixed to the screen while the outlines move with the form.
/particles/ink_weight sets how heavy the pen is. It works on
anything the surface mode draws: a cloud, glyphs, a fractal solid or the
room.
Liquid
/particles/liquid melts the surface mode's discs into one
glossy surface. The depth they leave is blurred over a few discs' width, but
only between discs at about the same depth, so the surface does not run
across a gap into what is behind it; the lighting reads the smoothed surface,
and shades it like water, with the sky and sharp highlights of the lamps and
sun reflected on top, more at a glancing angle. Glyphs, solids and the walls
are left alone. A slow envelope on it condenses and evaporates the cloud.
Camera and room
A real camera looks into the field: /camera/distance,
/camera/orbit, /camera/elevation,
/camera/fov, and /camera/pan_x /
/camera/pan_y to slide the view off-centre.
/camera/focus and /camera/defocus give real
depth of field — with defocus up, near and far particles bloom into soft
discs and the field gains depth a flat render cannot fake.
The room
An optional wireframe room sized to the frame, for forced perspective and
parallax. Raise /room/brightness to see it.
/room/depth sets how far back it goes,
/room/converge how hard the grid converges, and
/room/vanish_x / /room/vanish_y move the vanishing
point — which is how you match the room to where the audience actually sits
relative to the screen.
/room/anchor places the cloud between the front and back of the
room, and /room/embed bends the cloud's own perspective toward the
room's, so the particles sit in the space rather than floating in
front of a drawing of one. The built-in Stage preset is this
set up and ready.
Audio reactivity
vizz analyses an audio input into four bands plus a broadband level, and those are available as modulation sources.
- Open the panel's audio section and pick an input from the
device list. (Or start with
--audio-device "Scarlett"— it matches on a substring;--list-audioprints the names.) - Play something typical of your set — not a quiet intro.
- Press fit. Every band's gain is scaled from the last few seconds of what actually arrived.
- Check the meters. Each band shows two stacked bars: what modulation receives on top, what is arriving underneath. A red mark on the right means the band is pinned and the gain is too high.
The system default is usually the laptop's microphone, which hears the room — the crowd, the PA's slap-back — rather than the mix. For the music itself, take an interface input fed from the mixer, or a loopback device (BlackHole on macOS, VB-Cable on Windows) carrying what the DJ software plays. The panel says under the picker when the chosen input is a microphone, and the stage strip's device name is a click target with the same list behind it.
Each band has editable low and high edges in Hz and a gain in dB. The defaults are low / lo-mid / hi-mid / high, but a kick-only band of 40–90 Hz driving size is often more musical than a broad one.
There is no correct default gain. It depends on the interface, the track and how hard it is being driven. fit is the honest answer — it reads your actual signal instead of guessing.
Tempo and the beat clock
One beat clock drives the strobe, scene autopilot, phasors and beat triggers. It can get its tempo three ways:
- Tap — the tap button on the status line, or a learned MIDI button. Four taps is enough.
- Detected from the audio input.
- MIDI clock from a DJ mixer or DAW. vizz follows the wire with a tempo estimator built to shrug off USB jitter; a Start message resets the downbeat.
Tap and auto always win control back, so a stale clock source can never lock you out mid-set.
The modulation graph
Press G. Nodes on a canvas: sources on the left, operators in the middle, parameter sinks on the right. Drag from an output to an input to wire them.
Sources
| LFO | Free-running or beat-locked, several shapes. |
| Band | One of the four audio band envelopes, 0–1. |
| Level | Broadband level. |
| Phasor | A ramp 0–1 over N beats, locked to the beat clock, so the whole patch can phase off one saw. |
| Beat trigger | A pulse on each beat division boundary. Every trigger of the same division fires together. |
| Constant | A fixed value — useful as an offset or a manual depth. |
Operators
| Curve | Bend a linear signal into something with shape. |
| Math | Two inputs: add, multiply, min, max… |
| Scale | Affine — the workhorse for turning a unipolar source bipolar (multiply 2, add −1) or trimming a range. |
| Smooth | Asymmetric attack/release slew. Tames anything twitchy. |
| Quantise | Snap to N steps — turns a smooth sweep into something that lands. |
| Sample & hold | Latch a value when a trigger rises. |
| Gate | 1 above a threshold, 0 below, with hysteresis so a band hovering at the line does not chatter. |
| Envelope | Attack/decay fired by a rising edge. Retriggering climbs from the current level instead of clicking to zero. |
A worked patch: kick in, size punches out
- Add a Band node set to band 1 (the low band).
- Add a Gate and wire the band into it. Raise the threshold until it only opens on the kick.
- Add an Envelope — short attack, decay to taste — and wire the gate into its trigger.
- Add a Param sink addressed to
/particles/sizeand wire the envelope in. Set depth for how far it moves.
Swap the Band for a Beat trigger and the same chain is tempo-locked instead of audio-driven, with nothing else rewired.
Patches are saved separately from presets. The canvas remembers its pan, zoom and patch name across launches. A wire that would make a loop is refused with a reason, and a Param node aimed at nothing says missing rather than failing silently.
MIDI
Controllers connect automatically — plug one in and it appears in the panel's midi section. Nothing needs configuring first.
Learning a control
- Go to the performance layout (P).
- Click learn under the fader you want, or on a scene pad, or on a preset button.
- Move the knob or press the pad. The binding appears as a chip
(
ch1 cc21) under the control.
While learning, the panel echoes whatever is arriving — so a controller that is not sending at all is immediately distinguishable from a mapping problem. Bindings are saved as you make them and survive a restart.
Notes are momentary, CCs are absolute. A learned note on a punch gesture fires while held and releases when you let go, because the gesture rests at zero. A CC on a fader takes the fader's full range.
MIDI clock
If the device sends clock, vizz can follow it — see Tempo. Clock traffic can never be captured by a learn: an armed learn ignores clock messages, so arming a learn while a mixer is running does not immediately bind to the clock.
OSC
Send standard OSC to UDP 7000 (change it with
--osc-port). Float, int, double and bool arguments are all
accepted. Unknown addresses and malformed packets are logged and ignored —
control input can never crash the renderer.
# TouchOSC, Max, Pd, a Python script — anything that speaks OSC
/fx/trail 0.92
/shape/mode 5
/preset/recall 3
Every parameter in the app is an OSC address, and every address in the table below is a parameter — the panel is generated from the same table, so the two can never drift apart. The full list is below.
Two families of addresses are listened for without being parameters:
/composition/columns/N/connect and
/composition/decks/N/select, which are what Resolume Arena emits
when a column is launched and when a deck is chosen. They are translated into
/column/fire and /deck/select on the way in, and only
while following is on.
Keyboard
| 1–9, 0 | Fire preset slot 1–10 |
| Space | Flash — white out while held; shift latches |
| S B F I | Strobe, black, freeze, invert while held; shift latches |
| Tab | Show or hide the control panel |
| P | Performance layout |
| V | Watch the output — the controls stand aside (performance layout) |
| T | Tap the tempo — three taps set it |
| G | Modulation canvas |
| / | Filter the parameter list |
| ? | The shortcut list, on screen |
| F11 | Fullscreen on the window's monitor |
| Esc | Leave fullscreen; otherwise quit (asks once) |
Esc asks before quitting because it is one key, next to nothing, on a machine whose whole job is not going black. A second press within a few seconds confirms.
Syphon, NDI, ST 2110 and output sizes
Syphon (macOS)
On by default. vizz publishes a source named vizz that appears in
Resolume, VDMX, MadMapper and TouchDesigner with no configuration. It is
zero-copy — the texture is shared on the GPU, never read back — so it costs
almost nothing. Disable with --no-syphon; rename with
--syphon-name.
NDI (all platforms)
vizz --ndi                  # publish as "vizz"
vizz --ndi --ndi-name Deck1 # or under your own name
NDI needs the runtime installed on the machine; vizz loads it at runtime and says so clearly if it is missing. Frames are read back asynchronously through a ring, so a slow network drops frames on the NDI output and never stalls the renderer.
ST 2110 (all platforms)
vizz --st2110 239.1.1.1:5004 --st2110-rate 50 --width 1280 --height 720For broadcast gear that does not take NDI: vision mixers, multiviewers, IP-to-SDI gateways. vizz sends the master as uncompressed SMPTE ST 2110-20 video, YCbCr 4:2:2 at 10 bits in BT.709, which those receivers take without being asked. Uncompressed is heavy: 720p50 is 0.92 Gb/s and 1080p50 2.07 Gb/s, so anything above 720p50 needs a 10 Gb/s link. Send it on a wired media network, never over Wi-Fi, where multicast at that rate takes the network down for everyone on it.
A receiver joins from the SDP file vizz writes when the output starts,
~/.config/vizz/st2110.sdp unless --st2110-sdp says
otherwise. Give --st2110 twice for an ST 2022-7 pair,
--st2110-interface to pick the network port, and
--st2110-name for the name receivers list.
The stream keeps its own rate, --st2110-rate or else
--fps, whatever vizz renders at. When vizz renders slower, the
last picture repeats, so the stream freezes rather than breaks up. Without PTP
the stream is steady but lines up with nothing else in the plant. On a machine
whose clock follows the plant's PTP grandmaster, name it with
--st2110-clock <grandmaster>:<domain> and it does.
Render size and output size
In the panel's outputs section: set the output size (720p / 1080p / 1440p / 4K presets, or type one), and a render multiplier from 0.5× to 2×. Rendering below output size is the cheapest way to hold frame rate on a laptop; above it is supersampling.
16-bit float master gives the feedback chain headroom before it clips — worth it when trails and glow are heavy. It doubles the master texture's memory and is off by default.
Recording
vizz records the master output as an image sequence — JPEG at quality 92 and 30 fps by default, PNG on request from the panel's recording section. Every finished frame is a finished file, so a crash mid-take costs nothing already written.
- Press the REC chip on the performance layout's status strip. (The panel's outputs section has the same control, if that is where you already are.)
- The chip turns red and counts elapsed time, frames written and frames dropped.
- Press it again to stop. A notice names the folder.
Takes land in ~/Movies/vizz/vizz-<timestamp>/ on macOS and
~/Videos/vizz/… elsewhere; the recording section says so, and its
reveal button opens the folder. Assemble one with ffmpeg:
ffmpeg -framerate 30 -i frame_%06d.jpg -pix_fmt yuv420p take.mp4Use .png and the rate you recorded at if you changed either.
Alongside the frames is a take.json naming the look that was
recalled, the size, the rate, the format and the build that wrote it, and the
folder is named for the look (vizz-night-bus-…) when one was on
screen. Beside it is a frames.csv of per-frame wall-clock
times, so a take that dropped frames can be assembled honestly instead of
silently running fast.
Recording never stalls the show. A slow disk drops frames on the recording only, and the drops are counted on the chip rather than hidden. A full disk stops the take with a notice instead of retrying sixty times a second. Expect drops at 1080p60 — PNG encoding is at the edge of one core — and lower the output size if the count climbs.
/record/active is an ordinary parameter, so OSC and a learned MIDI
button can start and stop a take too.
Fullscreen and venue setup
F11 fills the monitor the window is on — drag the window to the projector first, then press it. The first Esc leaves fullscreen.
vizz --fullscreen              # start fullscreen
vizz --fullscreen --monitor 1  # on a specific monitor
The last F11 choice is remembered between launches, so a machine that always runs fullscreen does not need telling twice.
A venue checklist
- Set the output size to match what the projector or the VJ software expects, before the doors open.
- Pick the audio input and press fit while the opening act is playing, not during soundcheck silence.
- Learn your controller once — the map is saved and reloads next time.
- Store the looks you plan to use into scene pads, in the order you expect to play them.
- Check
/master/dimis bound to something you can reach in the dark. - If you are feeding another app, confirm it sees the Syphon or NDI source before you go fullscreen.
Every OSC address
Every parameter, with its range and default. This table is checked against the running app by a test, so it cannot drift out of date.
| Address | Range | Default | Meaning |
|---|---|---|---|
/particles/count | 0 – 500000 | 60000 | live particle count |
/particles/size | 0.001 – 0.2 | 0.015 | sprite size |
/particles/speed | 0 – 4 | 0.6 | motion rate (phase-continuous) |
/particles/spread | 0.05 – 3 | 1.2 | field radius |
/particles/hue | 0 – 1 | 0.58 | base hue |
/particles/saturation | 0 – 1 | 0.8 | color saturation |
/particles/brightness | 0 – 2 | 1 | value multiplier |
/particles/surface | 0 – 1 | 0 | draw mode: glowing light, or solid lit surfaces with depth and the sun's shadow |
/particles/stroke | 0 – 2 | 0 | what a glowing particle is: a dot, a line along its own path, or a streak of its motion |
/particles/stroke_len | 0 – 1 | 0.3 | how long a line or streak is |
/particles/plexus | 0 – 2 | 0 | lines between particles that come near each other; 0 is off |
/particles/plexus_reach | 0.02 – 0.5 | 0.15 | how near two particles must be to link, in world units |
/particles/glyph | 0 – 5 | 0 | what a solid particle is in the surface mode: a disc, or a small solid turned to its heading |
/particles/solid | 0 – 4 | 0 | a sphere-traced fractal solid in the surface mode: none · Mandelbulb · Mandelbox · quaternion Julia · Menger sponge |
/particles/solid_detail | 0 – 1 | 0.6 | the solid's one knob: the bulb's power, the box's scale, the Julia constant's turn, the sponge's depth |
/particles/ink | 0 – 3 | 0 | the surface mode as a pen drawing: off · outlines · hatching · stipple |
/particles/ink_weight | 0 – 1 | 0.5 | how heavy the pen is: line width, hatching spacing, stipple dot size |
/particles/liquid | 0 – 1 | 0 | the surface mode's discs smoothed into one glossy liquid surface; 0 is off |
/particles/splat | 0 – 1 | 0 | particles as soft, sorted Gaussian splats at this opacity; a splat capture keeps its own; 0 is off |
/shape/mode | 0 – 8 | 0 | geometry; fractional values morph: sphere · torus · knot · grid · shell · Lorenz · Aizawa · cloud pair · sphere again |
/shape/morph | 0 – 1 | 0 | extra blend into the next form |
/shape/twist | 0 – 2 | 0 | shear and vertical twist |
/shape/wind | 0 – 1 | 0 | a wind through the field — an ABC flow, divergence-free, blowing every form |
/shape/wind_rate | 0 – 2 | 0.3 | how fast the wind changes |
/fx/trail | 0 – 0.98 | 0 | feedback: how much of last frame survives |
/fx/zoom | 0.9 – 1.1 | 1 | per-frame zoom of the feedback (tunnels) |
/fx/spin | -0.1 – 0.1 | 0 | per-frame rotation of the feedback |
/fx/mirror | 0 – 3 | 0 | 0 off · 1 mirror · 2 quad · 3 kaleido |
/fx/glow | 0 – 1 | 0.25 | bloom lift |
/fx/shift | 0 – 1 | 0 | radial RGB split (chromatic aberration) |
/fx/grade | 0 – 1 | 0 | filmic grade: metered exposure, mip bloom and AgX, mixed over the original picture |
/fx/exposure | -4 – 4 | 0 | graded exposure bias, in stops |
/punch/flash | 0 – 1 | 0 | white-out while held — Space, a punch button, or a learned MIDI note |
/punch/black | 0 – 1 | 0 | blackout while held; rgb only, coverage stays |
/punch/invert | 0 – 1 | 0 | invert the finished picture while held |
/punch/freeze | 0 – 1 | 0 | hold the picture; the set keeps moving underneath |
/punch/strobe | 0 – 1 | 0 | beat-synced strobe while held |
/punch/strobe_div | 0.25 – 4 | 0.5 | beats per strobe cycle |
/color/palette | 0 – 15 | 0 | palette row: 0 hsv · 1 warm · 2 ember · 3 ice · 4 neon · 5+ loaded palettes |
/color/spread | 0 – 1 | 0.12 | how much of the palette the field spans |
/color/drive | 0 – 3 | 0 | what picks the colour: 0 index · 1 radius · 2 depth · 3 height |
/cloud/a | 0 – 8 | 0 | which cloud this look shows; set by clicking a name, not listed as a row |
/cloud/b | 0 – 8 | 1 | the cloud a transition is crossing to — driven by the transition, refused from OSC/MIDI/modulation |
/cloud/morph | 0 – 1 | 0 | where that crossing has got to — driven by the transition, refused from OSC/MIDI/modulation |
/video/depth | -2 – 2 | 0.6 | how far the picture's relief pushes along z; 0 is flat |
/video/relief | 0 – 3 | 0 | what pushes it: 0 luminance · 1 hue · 2 saturation · 3 chroma |
/lN/kind (N = 1–4) | 0 – 7 | 0 | layer generator: off · rings · stripes · checker · polygon · star · rays · dots |
/lN/freq (N = 1–4) | 0.5 – 64 | 8 | pattern frequency |
/lN/phase (N = 1–4) | 0 – 1 | 0 | pattern phase offset; unsmoothed, so steps snap |
/lN/drift (N = 1–4) | -2 – 2 | 0.1 | how fast the pattern walks on its own, turns/sec of visual time; 0 is still, negative reverses |
/lN/duty (N = 1–4) | 0.05 – 0.95 | 0.5 | ink/paper ratio within a period |
/lN/sides (N = 1–4) | 2 – 16 | 4 | polygon/star sides; a sweep, fractional counts morph |
/lN/inset (N = 1–4) | 0 – 1 | 0.5 | star valley depth |
/lN/fold (N = 1–4) | 0 – 12 | 0 | kaleidoscope wedges; below 2 is off |
/lN/invert (N = 1–4) | 0 – 1 | 0 | 0 fill · 1 invert |
/lN/x (N = 1–4) | -2 – 2 | 0 | layer centre, sideways |
/lN/y (N = 1–4) | -2 – 2 | 0 | layer centre, vertical |
/lN/rot (N = 1–4) | -2 – 2 | 0 | layer rotation, turns |
/lN/scale (N = 1–4) | 0.05 – 8 | 1 | layer scale |
/lN/color (N = 1–4) | 0 – 3 | 0 | which ink the layer prints with |
/lN/blend (N = 1–4) | 0 – 6 | 0 | normal · multiply · screen · add · difference · exclusion · subtract |
/lN/opacity (N = 1–4) | 0 – 1 | 1 | layer opacity |
/pal/0/r | 0 – 1 | 0.05 | ink 0 (near-black), r channel |
/pal/0/g | 0 – 1 | 0.05 | ink 0 (near-black), g channel |
/pal/0/b | 0 – 1 | 0.05 | ink 0 (near-black), b channel |
/pal/1/r | 0 – 1 | 0.92 | ink 1 (red), r channel |
/pal/1/g | 0 – 1 | 0.1 | ink 1 (red), g channel |
/pal/1/b | 0 – 1 | 0.14 | ink 1 (red), b channel |
/pal/2/r | 0 – 1 | 0.1 | ink 2 (blue), r channel |
/pal/2/g | 0 – 1 | 0.3 | ink 2 (blue), g channel |
/pal/2/b | 0 – 1 | 0.95 | ink 2 (blue), b channel |
/pal/3/r | 0 – 1 | 0.98 | ink 3 (yellow), r channel |
/pal/3/g | 0 – 1 | 0.8 | ink 3 (yellow), g channel |
/pal/3/b | 0 – 1 | 0.05 | ink 3 (yellow), b channel |
/vec/place | 0 – 1 | 0 | where the stack renders: 0 scene (behind particles, in the feedback chain) · 1 print (after post, exact ink) |
/camera/distance | 0.4 – 12 | 3.5 | orbit distance from the field |
/camera/orbit | -3.15 – 3.15 | 0 | orbit angle around the field |
/camera/elevation | -1.4 – 1.4 | 0.34 | height angle of the orbit |
/camera/fov | 0.2 – 2 | 0.9 | field of view, radians |
/camera/focus | 0 – 12 | 3.5 | focus distance |
/camera/defocus | 0 – 1 | 0 | depth-of-field blur amount |
/camera/pan_x | -4 – 4 | 0 | sideways pan of the view |
/camera/pan_y | -4 – 4 | 0 | vertical pan of the view |
/camera/at_x | -8 – 8 | 0 | where in the world the camera is aimed, X |
/camera/at_y | -8 – 8 | 0 | where in the world the camera is aimed, Y |
/camera/at_z | -8 – 8 | 0 | where in the world the camera is aimed, Z |
/camera/move | 0 – 10 | 0 | canned path: off, orbit, sway, push, pull, crane, spiral, look around, fly through, walkthrough, drift |
/camera/move_bars | 1 – 64 | 8 | bars per cycle of the move |
/camera/move_size | 0 – 1 | 0.5 | how far the move travels |
/room/brightness | 0 – 1 | 0 | wireframe room visibility |
/room/depth | 1 – 20 | 7 | how deep the room extends |
/room/fade | 0 – 1 | 0.75 | distance fade of the room lines |
/room/converge | 0 – 1 | 0.35 | perspective convergence of the grid |
/room/vanish_x | -1 – 1 | 0 | vanishing point, sideways |
/room/vanish_y | -1 – 1 | 0 | vanishing point, vertical |
/room/anchor | 0 – 1 | 0.35 | where the cloud sits between front and back |
/room/embed | 0 – 1 | 0 | how much the room's perspective bends the cloud |
/light/ambient | 0 – 1 | 1 | how much light there is everywhere; 1 is the unlit picture |
/light/shape | 0 – 1 | 1 | how much a surface's own orientation counts (needs normals) |
/light/torch | 0 – 1 | 0 | lamp 1 rides the camera |
/light/haze | 0 – 1 | 0 | a lit haze the lamps and the sun cut beams through; 0 is off |
/light/smoke | 0 – 2 | 1 | how much the particles thicken the haze into smoke |
/light/scatter | 0 – 0.95 | 0.6 | how much the haze scatters forwards, so a lamp seen through it glows |
/light/N/x (N = 1–2) | -6 – 6 | 0 | lamp N position, X |
/light/N/y (N = 1–2) | -6 – 6 | 0 | lamp N position, Y |
/light/N/z (N = 1–2) | -6 – 6 | 0 | lamp N position, Z |
/light/N/radius (N = 1–2) | 0.05 – 8 | 1.5 | lamp N reach |
/light/N/level (N = 1–2) | 0 – 2 | 0 | lamp N brightness |
/light/N/hue (N = 1–2) | 0 – 1 | 0 | lamp N colour |
/light/N/tint (N = 1–2) | 0 – 1 | 0 | how much of lamp N's colour to use; 0 is white |
/sun/level | 0 – 2 | 0 | directional key brightness (needs normals) |
/sun/azimuth | -3.15 – 3.15 | 0.8 | which way the sun is, around |
/sun/elevation | -1.57 – 1.57 | 0.6 | which way the sun is, up |
/sun/hue | 0 – 1 | 0.12 | sun colour |
/sun/tint | 0 – 1 | 0 | how much of the sun's colour to use; 0 is white |
/gravity/amount | 0 – 1 | 0 | master depth of the gravity layer |
/gravity/N/x (N = 0–3) | -3 – 3 | 0 | well N position, X |
/gravity/N/y (N = 0–3) | -3 – 3 | 0 | well N position, Y |
/gravity/N/z (N = 0–3) | -3 – 3 | 0 | well N position, Z |
/gravity/N/strength (N = 0–3) | -2 – 2 | 0 | pull (positive) or push (negative) |
/gravity/N/radius (N = 0–3) | 0.05 – 4 | 1 | well reach |
/gravity/fire | 0 – 16 | 0 | fire gravity scene 1–16 on change; 0 = none |
/gravity/time | 0 – 60 | 2 | gravity blend time, seconds |
/gravity/curve | 0 – 4 | 1 | 0 linear · 1 smooth · 2 ease in · 3 ease out · 4 cut |
/gravity/auto | 0 – 1 | 0 | gravity autopilot on/off |
/gravity/bars | 0.25 – 16 | 4 | bars between gravity autopilot steps |
/bg/red | 0 – 1 | 0.004 | background red |
/bg/green | 0 – 1 | 0.004 | background green |
/bg/blue | 0 – 1 | 0.008 | background blue |
/bg/alpha | 0 – 1 | 1 | background opacity; 0 delivers the field on nothing |
/preset/recall | 0 – 512 | 0 | recall preset N on change; 0 = none |
/scene/fire | 0 – 16 | 0 | fire scene 1–16 on change; 0 = none |
/scene/time | 0 – 60 | 2 | scene blend time, seconds |
/scene/curve | 0 – 4 | 1 | 0 linear · 1 smooth · 2 ease in · 3 ease out · 4 cut |
/scene/auto | 0 – 1 | 0 | scene autopilot on/off |
/scene/bars | 0.25 – 16 | 4 | bars between scene autopilot steps |
/deck/select | 0 – 24 | 0 | turn to page 1–24 on change; 0 = none |
/deck/next | 0 – 1 | 0 | turn to the next page on a rise; stops at the last |
/deck/prev | 0 – 1 | 0 | turn to the previous page on a rise; stops at the first |
/column/fire | 0 – 16 | 0 | fire column 1–16 — the scene pad and the gravity pad of that number, together |
/record/active | 0 – 1 | 0 | record the master to an image sequence; 1 starts, 0 stops |
/tempo/tap | 0 – 1 | 0 | tap the beat: each rise is one tap, and three set the tempo |
/master/dim | 0 – 1 | 1 | master fader |
Files and folders
~/.config/vizz/projects/<show>/ | One show — everything below this line lives in one of these |
presets/ | Your saved looks, one JSON each |
patches/ | Modulation graphs |
grid.json | The scene grid, as the live deck left it |
gravity-grid.json | The gravity grid, likewise |
decks.json | The set list: every page of pads, and which one is live |
macros.json | Your fader assignments |
~/.config/vizz/open.json | Which show is open |
~/.config/vizz/midi.json | Your controller map — the rig, so it stays put when the show changes |
~/.config/vizz/settings.json | Output size, audio device, loaded clouds, fullscreen — the rig too |
~/.config/vizz/st2110.sdp | What the ST 2110 output sends, written when it starts; receivers join from it |
~/Movies/vizz/ | Recordings (macOS; ~/Videos/vizz/ elsewhere) |
Built-in presets are compiled into the binary rather than written to disk, so they are always present, cannot be half-installed, and cannot be lost by clearing the config directory.
Upgrading from a build without shows moves what was in
~/.config/vizz/ into projects/Show 1/ on first launch.
Nothing is copied and nothing is left behind.
Command line
vizz --help                       # every flag
vizz --width 1920 --height 1080   # output size for this run
vizz --fullscreen --monitor 1     # start on a projector
vizz --ndi --no-syphon            # NDI only
vizz --st2110 239.1.1.1:5004      # ST 2110 video to a multicast group
vizz --audio-device "Scarlett"    # match an input by substring
vizz --list-audio                 # print input names and exit
vizz --cloud scan.ply             # load a cloud at startup
vizz --osc-port 7001              # listen somewhere else
vizz --headless --frames 600 --report bench.json
On macOS, double-clicking the app runs 1280×720 with OSC on 7000 and Syphon on; the window title shows the live settings. Flags need a terminal run.
Troubleshooting
I loaded a cloud and nothing changed
Loading one points /shape/mode at the cloud pair for you, so the
usual cause is something moving it back: a preset, a scene, or a modulation
route driving /shape/mode. Check what the shape
group's mode row reads — cloud pair is the position that
shows clouds — and whether it carries a ~.
The picture goes white and stays white
/fx/trail is very high and the frame is saturating. Bring it
down. (It is capped below 1.0 precisely so this is recoverable.)
Nothing reacts to the music
Check the panel's audio section shows a device and the meters are moving. If the bars move but nothing on screen does, no modulation is routed yet — see the graph. If the bars are pinned to full, press fit.
My controller does nothing
Open the panel's midi section: if the device is not listed, it is a connection problem, not a mapping one. If it is listed, arm a learn and watch the echo line — it names whatever arrives.
The receiving app cannot see vizz
Check the status line: each output has a dot, green when live. Syphon is macOS-only. NDI needs its runtime installed, and the panel says so if it is missing. An ST 2110 receiver needs the SDP file vizz writes when the output starts, and a wired network that carries the multicast group to it.
I set layer parameters and nothing changed
Check the layer's kind is not off — kind 0 removes the
layer regardless of its other settings — and check /vec/place:
in print placement the stack replaces the finished frame, so if
another look is on screen the stack may be in scene placement behind
an opaque particle field. Recalling a vector preset resets all of this.
Frame rate is low
Open health in the panel for frame-time percentiles and the
over-budget count. Lower the render multiplier first, then
/particles/count. Heavy feedback plus glow at 4K is the usual
culprit.
It asks twice before quitting
That is deliberate. Esc is one key next to nothing, and a single press ending the show is the one destructive keystroke worth guarding.